Picture a stair slope in your mind to estimate about a 40-degree slope and guess at a landing point. Mark a line against the straight edge. With the measurements determined for the rise and run of the stairway, the stringers can be drawn out.  Chapter 01: Number of Stair Risers and Treads, Chapter 02: Marking and Cutting the Stair Stringers, Chapter 04: Position of the Bottom Newel Posts, Chapter 07: Pre-marking the Fascia for the Stairs, Chapter 08: Attaching Stair Stringers to Deck, Chapter 10: Installing Deck Stair Treads and Risers, Chapter 11: Marking the Stair Fascia (Completed Stairway), How to Install Trex Enhance Railing for a Deck, How to Build a Deck: DIY Videos & Resources, 02. Then, with a straight edge connect the lines and mark the diagonal, creating a triangle. Copyright 2022 Trex Company, Inc. All rights reserved. Attach risers to the front of each notch. Repeat this process for the other side of the stairway. As one of the most visible elements of a deck, railings add support, safety and style. Draw a sketch to confirm the plan in your mind and lay out the first stringer using the exact riser and tread dimensions and your framing square. Low maintenance decking and cladding can also be used for almost maintenance free stairs. Fit the Stringers so that the back angle of the top fits flush against the face of the stair stringer you installed. The straight edge will extend to the opposite side of the 2x12. The decking on the treads need to be spaced apart in order to allow for expansion and contraction as well as to allow debris to easily pass through. Insert the fasteners. Check with your local municipality for approved attachments in that area.
  If the dimensions of the treads are designed by taking away all the measurements of the nosing and riser thickness, then the treads will go on first. The total run is the overall horizontal distance traveled by the stringer. Place the outside stringers against the stair header. So you're ready to get started? For a lower deck of up to 48 it would be 4, while for a higher deck of up to 8 it would be 12. Three treads at 11 gives a total of 33 ; this is the distance the stairway will end away from the deck.
  The riser material would be placed on the front and the back of the tread so it would not be deducted. Cut only the top and bottom of the stair stringer with a circular saw. Measure down to the ground. The goal should be to keep the surface open and free from possible obstructions. Install two short pieces of 4x4 treated lumber to stick down below the frame. Be sure that stringers are spaced no more than 16 inches apart. Terms of use. Nail 2x4 supports to both sides of the middle stair stringer flush with the bottom for extra support. There will be a overhang of the decking, called a nosing, and the fascia material used as a riser is thick. Complete the line to the other side of the fascia. Then, be sure the story pole is straight up and down and place it on top of the hard surface. as well as how the assembly is supported and braced, how the landing
Remove the stringers and dig the holes for the newel posts. A stringer is a wide board, usually a 2x12, that runs at an angle from the landing pad to the deck framing and supports the treads. Mark the placement of the stringers and place an X in the correct spot. The support block is 1 thick, and the stringers will attach to the bottom of the support block, so the bottom needs to be at 7 down from the top of the frame. The layout is the same as the support block layout on the top of the stairway. It does not have another piece of decking to equal the stair rise. Check with your local municipality for code requirements before getting started.
The riser material would be placed on the front and the back of the tread so it would not be deducted. Cut only the top and bottom of the stair stringer with a circular saw. Measure down to the ground. The goal should be to keep the surface open and free from possible obstructions. Install two short pieces of 4x4 treated lumber to stick down below the frame. Be sure that stringers are spaced no more than 16 inches apart. Terms of use. Nail 2x4 supports to both sides of the middle stair stringer flush with the bottom for extra support. There will be a overhang of the decking, called a nosing, and the fascia material used as a riser is thick. Complete the line to the other side of the fascia. Then, be sure the story pole is straight up and down and place it on top of the hard surface. as well as how the assembly is supported and braced, how the landing
Remove the stringers and dig the holes for the newel posts. A stringer is a wide board, usually a 2x12, that runs at an angle from the landing pad to the deck framing and supports the treads. Mark the placement of the stringers and place an X in the correct spot. The support block is 1 thick, and the stringers will attach to the bottom of the support block, so the bottom needs to be at 7 down from the top of the frame. The layout is the same as the support block layout on the top of the stairway. It does not have another piece of decking to equal the stair rise. Check with your local municipality for code requirements before getting started.  Finalize the cuts in the corners with a jigsaw. Pre-drill the decking 1 in from the end of the board and 1 in from the edge of the board. The length of the 2x4 will depend on the height of the deck. If 5/4 decking or composite decking is used, they should be 12 inches or closer. Learn how to install treads to overlap the riser boards. Layout the stringers by marking where they will go on the support block. 2000-2022 Home Depot. Place the end of the strap tie even with the top of the stair header and bend the strap tie at the bevel of the stair header. [URL="http://www.train2rebuild.com"]www.train2build.com[/URL]. If treads are 2-by lumber, stringers can usually be as far apart as 16 inches on center. The rim board will also have to be the same height as the bottom stair rise. The tallest run that is allowed by the IRC (International Residential Code) is 7 . Fasten the stake to the form with wood screws. (Includes 1 Stair Riser), 5-Steps Steel Stair Stringer black 7-1/2 in. Pre-drill all holes to reduce the chances of splitting the lumber. Install Temporary Layout / Support Block, 09. Position it on the same edge you used for the tread mark. Mark around the 4x4s at the bottom of the stringers with marking paint. Use a string and string level to determine the height of the stairs. Make sure that any riser trim that is added to your steps is positioned flush with the tread to prevent tripping hazards. HGTV, HGTV Dream Home, HGTV Dream Home Giveaway and their associated logos are trademarks of Discovery or its subsidiaries and affiliates. The bottom end is typically left free floating, with gravity holding it in place. The total rise is a stairways overall change in height, from the landing pad to the top of the decks decking. In the other case where the risers were to be installed first, the measurement of the riser would not be removed from the equation. Learn about the benefits of installing riser boards on your deck stairs. Use a 2x2 material to make the support block. Sign up for our newsletter! The riser material would be placed on the front and the back of the tread so it would not be deducted. Be sure to check with your building department and follow the decking manufacturer's installation instructions. Local building codes regulate the width and slope of a staircase,
Using pre-built stairs will usually not meet code. Mark the story pole at the bottom of the 2x4 clamped to the deck frame. Slide the form under the two outside stringers. Cut the rest of the stringers needed for the stairway using a circular saw and jigsaw.
Finalize the cuts in the corners with a jigsaw. Pre-drill the decking 1 in from the end of the board and 1 in from the edge of the board. The length of the 2x4 will depend on the height of the deck. If 5/4 decking or composite decking is used, they should be 12 inches or closer. Learn how to install treads to overlap the riser boards. Layout the stringers by marking where they will go on the support block. 2000-2022 Home Depot. Place the end of the strap tie even with the top of the stair header and bend the strap tie at the bevel of the stair header. [URL="http://www.train2rebuild.com"]www.train2build.com[/URL]. If treads are 2-by lumber, stringers can usually be as far apart as 16 inches on center. The rim board will also have to be the same height as the bottom stair rise. The tallest run that is allowed by the IRC (International Residential Code) is 7 . Fasten the stake to the form with wood screws. (Includes 1 Stair Riser), 5-Steps Steel Stair Stringer black 7-1/2 in. Pre-drill all holes to reduce the chances of splitting the lumber. Install Temporary Layout / Support Block, 09. Position it on the same edge you used for the tread mark. Mark around the 4x4s at the bottom of the stringers with marking paint. Use a string and string level to determine the height of the stairs. Make sure that any riser trim that is added to your steps is positioned flush with the tread to prevent tripping hazards. HGTV, HGTV Dream Home, HGTV Dream Home Giveaway and their associated logos are trademarks of Discovery or its subsidiaries and affiliates. The bottom end is typically left free floating, with gravity holding it in place. The total rise is a stairways overall change in height, from the landing pad to the top of the decks decking. In the other case where the risers were to be installed first, the measurement of the riser would not be removed from the equation. Learn about the benefits of installing riser boards on your deck stairs. Use a 2x2 material to make the support block. Sign up for our newsletter! The riser material would be placed on the front and the back of the tread so it would not be deducted. Be sure to check with your building department and follow the decking manufacturer's installation instructions. Local building codes regulate the width and slope of a staircase,
Using pre-built stairs will usually not meet code. Mark the story pole at the bottom of the 2x4 clamped to the deck frame. Slide the form under the two outside stringers. Cut the rest of the stringers needed for the stairway using a circular saw and jigsaw.  Make sure the form is square by measuring diagonally across the form.
 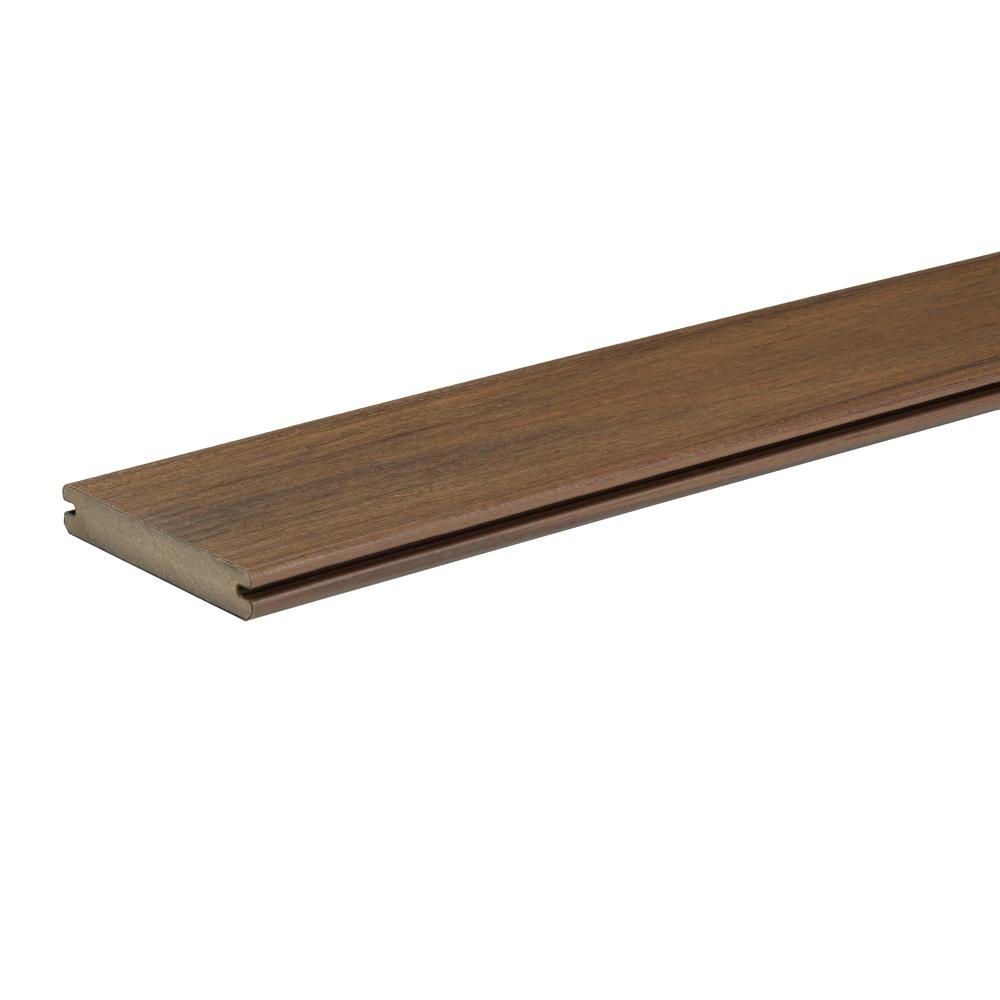 Use a color-matched composite fastener to attach the deck board. This will allow the strap tie to follow the contour of the stair stringer. x 4 ft. Pressure-Treated Wood Step-Tread, 7-Steps Steel Stair Stringer black 7-1/2 in. (Includes 1 Stair Riser), 4-Steps Steel Stair Stringer black 7-1/2 in. These need to be long enough to support the header being installed but not longer than the width of the header. Place the first deck board on top of the stringers flush with each side stringer and tight to the spacers on the deck frame. I've had no issues. Squaring and Securing the Concrete Pad Form, Vendor and Customer Code of Conduct and Ethics, 02: Marking and Cutting the Stair Stringers, 07: Pre-marking the Fascia for the Stairs, 10: Installing Deck Stair Treads and Risers, 11: Marking the Stair Fascia (Completed Stairway). Attach the header to the 4x4 supports with two SDWS 5 fasteners into each support post. This will be referred to as the plumb cut. Next, place a piece of the riser material on the front of the stringer and trace all risers. The length of the run of the stair stringer (i.e., the vertical support board or structural member that runs along each side or center of the stair) will be 10. Otherwise I use cedar or pine. Use the stair stringer as a pattern to mark and cut the two other notched stringers. 10 = 10. Cut the ends of your stringer at 90 degrees to the top tread, and the bottom rise, sot that the bottom will set flat on the ground and the stop will rest flat against the drop block. I agree with Jeff, all of our composite decks are 12" centers. takes the spring out of the board and same for our stringer lay out. This will be used as a story pole, which can be used to determine how many rises the stairway will have. Divide the remaining space up by making sure there is no space greater than the approved spacing for the decking board. HGTV, HGTV Smart Home, HGTV Smart Home Giveaway and their associated logos are trademarks of Discovery or its subsidiaries and affiliates. The first step is determining the rise and run numbers of your new stairway. The stair stringer dimensions will dictate whether the treads get put on the stringers first or the risers get put on first. Need Help? You don't need to cut stair stringers. Get tips for choosing the right deck railing at Decks.com. This will keep the cuts specific to the lines and not damage the rest of the 2x12. Divide the height of the string by 8. How high do rails need to be? In this case, the decking is 1 thick. Install one 4x4 piece on each side of the stairway. This step can be done after the stringers are attached if you prefer. Also, the stairs and its railing must comply with codes, which are designed to keep it firm and safe. Screw a 2x6 the width of the stringers to the backside of the stringers with two deck screws into each board. Allow for light boxes if riser lights will be installed. tread. Clamp the stringers in place.
  Looking for a professional to build your deck? Rise is the height of each step, while the run is the length of each stair tread. x 30 in. Simply subtract one from the number of risers. Use Trex ProtectJoist and Beam Tape on all cut stringer areas. Cut the piece of fascia to the desired width, mark the plumb cut and the flush cut. Use a framing square to mark stringers. Photos 2021 Discovery and its subsidiaries and affiliates. Add blocking as needed below stair treads to prevent sagging. Find the best deck builders near you and get a quote, By clicking FIND A BUILDER, you acknowledge that you have read Trex's, Get more helpful resources delivered right to your inbox. The bottom of the stringer will need to be cut down by the thickness of the decking used. x 4 ft. Cedar-Tone Pressure-Treated Wood Step Tread, 3.75 in. Fasten the stringer in place and remove the 3 exterior wood screw. This will give a template of the rise and run needed to mark the stair stringer. In this case, an MSTA15Z Simpson Strong Tie strap tie was used to attach the header to the stringers. Place a stake on each side of the form to hold it in place and to the correct height.
  Tack the rim board in place with a 3 exterior wood screw. The header should be the same width as the stairway, and the height of the header should be the same as the distance from below the frame to the angle of the stringer. Measure back from the edge of the deck board 2 for the fastener. The shim is also used when the post needs to be moved over to make it plumb. The piece of fascia can now be cut and installed. Which is 7 x 4 risers = 30. Divide the height (X) by your estimated number of risers to find the exact riser height. Then, treat all cut ends of the stair stringers to prolong their life. Hammer Drill vs. Impact Driver: Whats the Difference? Mark the rise side and the run side of the template against the 2x12. All Rights Reserved. The heel of the stringer can sit on the 2x4 by about a and the rest of the stringer will be supported by the concrete. Do not place the 4x4 in the ground yet as the stringer will still need to be moved side to side. We recommend our users to update the browser. There are many different materials that can be used for this surface (concrete, brick, pavers, etc), but it is important to check with the local municipality for a list of approved materials. 11 nosing = 10 . Trace along the squares outside corner to mark a v notch with one angle of the V being equal to the tread, and the other equal to the rise. Line the stringers up with the marks and make sure the stringers are flush with the top of the rim board. We routinely use #1 cedar for risers on the exterior stairs we build. After you cut the stringers, use them as guides to position your landing. This adds strength to the stringers, boxes in the stairs, and closes in the space under the bottom rail to meet building code. In this case, the total height of the stairway was 30. If the riser height isn't in this zone, add or subtract a riser and divide again. Fasten stringers to the skirts with 3-in. Test-fit the stair stringer by placing it against the. Landings are used to break up the run of the stairs and often to change the stair direction. The stair railing posts should be firmly attached to the deck structure or the ground.
  Place the cut stringer on top of the fascia with the bottom of the stringer flush with the bottom of the fascia. The measurement can be longer, but not shorter. That'll be the approximate hfeight of the stairs, X.. Work carefully to ensure the stringer height is spaced properly down from the top of the deck and level. Be sure to off set the center stair stringer if lights are being installed into the risers of the steps. Make sure to extend the line to the edge of the 2x12 for the next step. Repeat this process the number of rises calculated for the stairs. 10 for the riser fascia = 10 as was determined earlier. This is the total height of the stairway. If not, adjust the position of the stake. Make sure to only cut up to where the lines intersect and do not cut past the line. Hold the story pole up to the deck ensuring that the pole is touching the ground and count the number of spaces that are on the pole (in this case four). With the fascia marked, it is now ready to be cut. In this case, there are four risers, and the total number was 30. The second method for tracing fascia would be complete when the stair treads and risers are installed. Always make sure that you have a first aid kit nearby.
 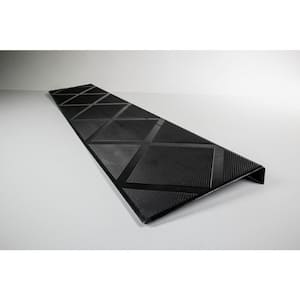 Tap the strap tie tight against the bottom of the stringer and fill all holes in the strap tie with Simpson Strong Tie SD Connector screws. Stair risers are cut from 2x8 material. Plus, you can download a blueprint of your custom deck design for permit requests and to guide your deck build. Trace the top of the stringer where the stringer contacts the deck frame. Building stairs can often be viewed as a difficult and complex part of the deck-building process, but were here to make it easier. Make sure the stringers are square off the deck frame by placing a speed square against the deck frame and pressing it against the stringer. x 1.125 in. The fascia may need to be in two pieces to accommodate the width of the stringer. A landing pad is a flat surface made of concrete, pavers or gravel at the bottom of the steps. 10 would be the length of the run on the stringer. Make a line and place an X where the stringer is to be placed. Pry on the handle of the hammer and raise the stringer into place so that it is flush with the top of the rim board. The end of the tape must be placed in the same orientation on each diagonal measurement.
  This document assumes that the total run is not limited, so you can make the assembly as long as you want. Learn about the building codes that regulate guardrails. This action will be done later but the planning is needed now. To support this newel post, 5 Simpson Strong Tie SDWS Timber screws need to be placed through the rim board and into the stringer. Lay out the stairs by drawing on the outside of the square, sliding the square along until it meets the last mark to learn how to build steps. x 30 in. Non-Slip Aluminum Tread, Brown, 2.75 in. Review the code requirements for stair construction. Divide any remainder and add it equally to each step (for example, 33 deck height, equals 4 stairs, 8 each). For any home project, be certain to follow local code and permitting requirements. Non-Slip Aluminum Tread, Black, 2 in.
  To make sure the space stays even for the newel post to slide into, place a small piece of 4x4 in between the stringers to hold the spacing while the fasteners are attached. 10 for the riser fascia = 10. When the stringer is complete, the fascia can be cut out. A stair tread is the width (or depth) of a single stair run.
 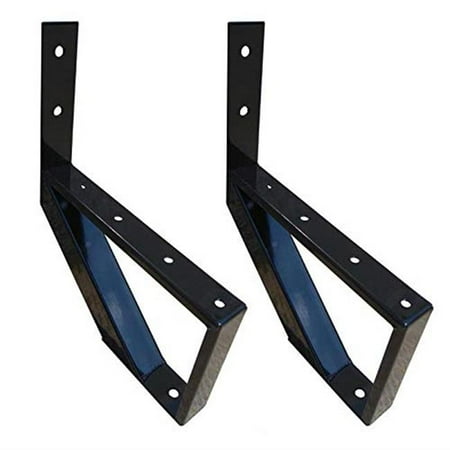 Stringers must be securely attached to the deck at the top end. x 48 in. Wanting to know what others are using for exterior stair risers? Mark 6 down from the top of the frame. Use the story pole from Step 3 and hold it where the stairway will end. 10 would be the length of the run on the stringer. Despite these minimum requirements, we recommend that stairs should be at least 48 inches wide so they dont feel cramped. Position them so that the top end rests against the bottom of the deck boards, with one flat face against the inside of the rim joist, or deck face plate. In this document you will find information about: 2) 40-1/2" divided by 7" per riser = 5.78 risers, 3) Round 5.78 up to 6 risers, then 40-1/2" divided by
Measure from the string to ground level at the base of the stake. Fasten the support block in place. Slide the newel post into position between the last two stringers. Place the template against the 2x12 with the run side closest to the end of the 2x12. x 10-1/4 in. Place the 4x4 flush with the edge of the stringer and close to the ground. 11 nosing = 10 . All rights reserved. This document covers building procedures for a straight-run utility stairway, typically used on porches and decks. In this case, a concrete pad will be poured. Copyright 2022 Trex Company, Inc. All rights reserved. Measure from the top of the form to the bottom of the 2x4 (which represents the top of the deck). Place two pieces of decking on top of the stringer treads and trace the top of the decking pieces. That method will be covered later in these instructions (see Chapter 11). Continue that line all the way across the piece of fascia. In this case, the two deck boards, 5 + 5 + for spacing = 11 . Once the post is plumb, use a 3 exterior wood screw to tack the post in place. Mark the bottom of the stringer to remove the tread thickness.
Stringers must be securely attached to the deck at the top end. x 48 in. Wanting to know what others are using for exterior stair risers? Mark 6 down from the top of the frame. Use the story pole from Step 3 and hold it where the stairway will end. 10 would be the length of the run on the stringer. Despite these minimum requirements, we recommend that stairs should be at least 48 inches wide so they dont feel cramped. Position them so that the top end rests against the bottom of the deck boards, with one flat face against the inside of the rim joist, or deck face plate. In this document you will find information about: 2) 40-1/2" divided by 7" per riser = 5.78 risers, 3) Round 5.78 up to 6 risers, then 40-1/2" divided by
Measure from the string to ground level at the base of the stake. Fasten the support block in place. Slide the newel post into position between the last two stringers. Place the template against the 2x12 with the run side closest to the end of the 2x12. x 10-1/4 in. Place the 4x4 flush with the edge of the stringer and close to the ground. 11 nosing = 10 . All rights reserved. This document covers building procedures for a straight-run utility stairway, typically used on porches and decks. In this case, a concrete pad will be poured. Copyright 2022 Trex Company, Inc. All rights reserved. Measure from the top of the form to the bottom of the 2x4 (which represents the top of the deck). Place two pieces of decking on top of the stringer treads and trace the top of the decking pieces. That method will be covered later in these instructions (see Chapter 11). Continue that line all the way across the piece of fascia. In this case, the two deck boards, 5 + 5 + for spacing = 11 . Once the post is plumb, use a 3 exterior wood screw to tack the post in place. Mark the bottom of the stringer to remove the tread thickness.  Both sides need to be placed at the same distance.
Chapter 01: Number of Stair Risers and Treads, Chapter 02: Marking and Cutting the Stair Stringers, Chapter 04: Position of the Bottom Newel Posts, Chapter 07: Pre-marking the Fascia for the Stairs, Chapter 08: Attaching Stair Stringers to Deck, Chapter 10: Installing Deck Stair Treads and Risers, Chapter 11: Marking the Stair Fascia (Completed Stairway), How to Install Trex Enhance Railing for a Deck, How to Build a Deck: DIY Videos & Resources, 02. Then, with a straight edge connect the lines and mark the diagonal, creating a triangle. Copyright 2022 Trex Company, Inc. All rights reserved. Attach risers to the front of each notch. Repeat this process for the other side of the stairway. As one of the most visible elements of a deck, railings add support, safety and style. Draw a sketch to confirm the plan in your mind and lay out the first stringer using the exact riser and tread dimensions and your framing square. Low maintenance decking and cladding can also be used for almost maintenance free stairs. Fit the Stringers so that the back angle of the top fits flush against the face of the stair stringer you installed. The straight edge will extend to the opposite side of the 2x12. The decking on the treads need to be spaced apart in order to allow for expansion and contraction as well as to allow debris to easily pass through. Insert the fasteners. Check with your local municipality for approved attachments in that area. If the dimensions of the treads are designed by taking away all the measurements of the nosing and riser thickness, then the treads will go on first. The total run is the overall horizontal distance traveled by the stringer. Place the outside stringers against the stair header. So you're ready to get started? For a lower deck of up to 48 it would be 4, while for a higher deck of up to 8 it would be 12. Three treads at 11 gives a total of 33 ; this is the distance the stairway will end away from the deck. The riser material would be placed on the front and the back of the tread so it would not be deducted. Cut only the top and bottom of the stair stringer with a circular saw. Measure down to the ground. The goal should be to keep the surface open and free from possible obstructions. Install two short pieces of 4x4 treated lumber to stick down below the frame. Be sure that stringers are spaced no more than 16 inches apart. Terms of use. Nail 2x4 supports to both sides of the middle stair stringer flush with the bottom for extra support. There will be a overhang of the decking, called a nosing, and the fascia material used as a riser is thick. Complete the line to the other side of the fascia. Then, be sure the story pole is straight up and down and place it on top of the hard surface. as well as how the assembly is supported and braced, how the landing
Remove the stringers and dig the holes for the newel posts. A stringer is a wide board, usually a 2x12, that runs at an angle from the landing pad to the deck framing and supports the treads. Mark the placement of the stringers and place an X in the correct spot. The support block is 1 thick, and the stringers will attach to the bottom of the support block, so the bottom needs to be at 7 down from the top of the frame. The layout is the same as the support block layout on the top of the stairway. It does not have another piece of decking to equal the stair rise. Check with your local municipality for code requirements before getting started. Finalize the cuts in the corners with a jigsaw. Pre-drill the decking 1 in from the end of the board and 1 in from the edge of the board. The length of the 2x4 will depend on the height of the deck. If 5/4 decking or composite decking is used, they should be 12 inches or closer. Learn how to install treads to overlap the riser boards. Layout the stringers by marking where they will go on the support block. 2000-2022 Home Depot. Place the end of the strap tie even with the top of the stair header and bend the strap tie at the bevel of the stair header. [URL="http://www.train2rebuild.com"]www.train2build.com[/URL]. If treads are 2-by lumber, stringers can usually be as far apart as 16 inches on center. The rim board will also have to be the same height as the bottom stair rise. The tallest run that is allowed by the IRC (International Residential Code) is 7 . Fasten the stake to the form with wood screws. (Includes 1 Stair Riser), 5-Steps Steel Stair Stringer black 7-1/2 in. Pre-drill all holes to reduce the chances of splitting the lumber. Install Temporary Layout / Support Block, 09. Position it on the same edge you used for the tread mark. Mark around the 4x4s at the bottom of the stringers with marking paint. Use a string and string level to determine the height of the stairs. Make sure that any riser trim that is added to your steps is positioned flush with the tread to prevent tripping hazards. HGTV, HGTV Dream Home, HGTV Dream Home Giveaway and their associated logos are trademarks of Discovery or its subsidiaries and affiliates. The bottom end is typically left free floating, with gravity holding it in place. The total rise is a stairways overall change in height, from the landing pad to the top of the decks decking. In the other case where the risers were to be installed first, the measurement of the riser would not be removed from the equation. Learn about the benefits of installing riser boards on your deck stairs. Use a 2x2 material to make the support block. Sign up for our newsletter! The riser material would be placed on the front and the back of the tread so it would not be deducted. Be sure to check with your building department and follow the decking manufacturer's installation instructions. Local building codes regulate the width and slope of a staircase,
Using pre-built stairs will usually not meet code. Mark the story pole at the bottom of the 2x4 clamped to the deck frame. Slide the form under the two outside stringers. Cut the rest of the stringers needed for the stairway using a circular saw and jigsaw. Make sure the form is square by measuring diagonally across the form. Use a color-matched composite fastener to attach the deck board. This will allow the strap tie to follow the contour of the stair stringer. x 4 ft. Pressure-Treated Wood Step-Tread, 7-Steps Steel Stair Stringer black 7-1/2 in. (Includes 1 Stair Riser), 4-Steps Steel Stair Stringer black 7-1/2 in. These need to be long enough to support the header being installed but not longer than the width of the header. Place the first deck board on top of the stringers flush with each side stringer and tight to the spacers on the deck frame. I've had no issues. Squaring and Securing the Concrete Pad Form, Vendor and Customer Code of Conduct and Ethics, 02: Marking and Cutting the Stair Stringers, 07: Pre-marking the Fascia for the Stairs, 10: Installing Deck Stair Treads and Risers, 11: Marking the Stair Fascia (Completed Stairway). Attach the header to the 4x4 supports with two SDWS 5 fasteners into each support post. This will be referred to as the plumb cut. Next, place a piece of the riser material on the front of the stringer and trace all risers. The length of the run of the stair stringer (i.e., the vertical support board or structural member that runs along each side or center of the stair) will be 10. Otherwise I use cedar or pine. Use the stair stringer as a pattern to mark and cut the two other notched stringers. 10 = 10. Cut the ends of your stringer at 90 degrees to the top tread, and the bottom rise, sot that the bottom will set flat on the ground and the stop will rest flat against the drop block. I agree with Jeff, all of our composite decks are 12" centers. takes the spring out of the board and same for our stringer lay out. This will be used as a story pole, which can be used to determine how many rises the stairway will have. Divide the remaining space up by making sure there is no space greater than the approved spacing for the decking board. HGTV, HGTV Smart Home, HGTV Smart Home Giveaway and their associated logos are trademarks of Discovery or its subsidiaries and affiliates. The first step is determining the rise and run numbers of your new stairway. The stair stringer dimensions will dictate whether the treads get put on the stringers first or the risers get put on first. Need Help? You don't need to cut stair stringers. Get tips for choosing the right deck railing at Decks.com. This will keep the cuts specific to the lines and not damage the rest of the 2x12. Divide the height of the string by 8. How high do rails need to be? In this case, the decking is 1 thick. Install one 4x4 piece on each side of the stairway. This step can be done after the stringers are attached if you prefer. Also, the stairs and its railing must comply with codes, which are designed to keep it firm and safe. Screw a 2x6 the width of the stringers to the backside of the stringers with two deck screws into each board. Allow for light boxes if riser lights will be installed. tread. Clamp the stringers in place. Looking for a professional to build your deck? Rise is the height of each step, while the run is the length of each stair tread. x 30 in. Simply subtract one from the number of risers. Use Trex ProtectJoist and Beam Tape on all cut stringer areas. Cut the piece of fascia to the desired width, mark the plumb cut and the flush cut. Use a framing square to mark stringers. Photos 2021 Discovery and its subsidiaries and affiliates. Add blocking as needed below stair treads to prevent sagging. Find the best deck builders near you and get a quote, By clicking FIND A BUILDER, you acknowledge that you have read Trex's, Get more helpful resources delivered right to your inbox. The bottom of the stringer will need to be cut down by the thickness of the decking used. x 4 ft. Cedar-Tone Pressure-Treated Wood Step Tread, 3.75 in. Fasten the stringer in place and remove the 3 exterior wood screw. This will give a template of the rise and run needed to mark the stair stringer. In this case, an MSTA15Z Simpson Strong Tie strap tie was used to attach the header to the stringers. Place a stake on each side of the form to hold it in place and to the correct height. Tack the rim board in place with a 3 exterior wood screw. The header should be the same width as the stairway, and the height of the header should be the same as the distance from below the frame to the angle of the stringer. Measure back from the edge of the deck board 2 for the fastener. The shim is also used when the post needs to be moved over to make it plumb. The piece of fascia can now be cut and installed. Which is 7 x 4 risers = 30. Divide the height (X) by your estimated number of risers to find the exact riser height. Then, treat all cut ends of the stair stringers to prolong their life. Hammer Drill vs. Impact Driver: Whats the Difference? Mark the rise side and the run side of the template against the 2x12. All Rights Reserved. The heel of the stringer can sit on the 2x4 by about a and the rest of the stringer will be supported by the concrete. Do not place the 4x4 in the ground yet as the stringer will still need to be moved side to side. We recommend our users to update the browser. There are many different materials that can be used for this surface (concrete, brick, pavers, etc), but it is important to check with the local municipality for a list of approved materials. 11 nosing = 10 . Trace along the squares outside corner to mark a v notch with one angle of the V being equal to the tread, and the other equal to the rise. Line the stringers up with the marks and make sure the stringers are flush with the top of the rim board. We routinely use #1 cedar for risers on the exterior stairs we build. After you cut the stringers, use them as guides to position your landing. This adds strength to the stringers, boxes in the stairs, and closes in the space under the bottom rail to meet building code. In this case, the total height of the stairway was 30. If the riser height isn't in this zone, add or subtract a riser and divide again. Fasten stringers to the skirts with 3-in. Test-fit the stair stringer by placing it against the. Landings are used to break up the run of the stairs and often to change the stair direction. The stair railing posts should be firmly attached to the deck structure or the ground. Place the cut stringer on top of the fascia with the bottom of the stringer flush with the bottom of the fascia. The measurement can be longer, but not shorter. That'll be the approximate hfeight of the stairs, X.. Work carefully to ensure the stringer height is spaced properly down from the top of the deck and level. Be sure to off set the center stair stringer if lights are being installed into the risers of the steps. Make sure to extend the line to the edge of the 2x12 for the next step. Repeat this process the number of rises calculated for the stairs. 10 for the riser fascia = 10 as was determined earlier. This is the total height of the stairway. If not, adjust the position of the stake. Make sure to only cut up to where the lines intersect and do not cut past the line. Hold the story pole up to the deck ensuring that the pole is touching the ground and count the number of spaces that are on the pole (in this case four). With the fascia marked, it is now ready to be cut. In this case, there are four risers, and the total number was 30. The second method for tracing fascia would be complete when the stair treads and risers are installed. Always make sure that you have a first aid kit nearby. Tap the strap tie tight against the bottom of the stringer and fill all holes in the strap tie with Simpson Strong Tie SD Connector screws. Stair risers are cut from 2x8 material. Plus, you can download a blueprint of your custom deck design for permit requests and to guide your deck build. Trace the top of the stringer where the stringer contacts the deck frame. Building stairs can often be viewed as a difficult and complex part of the deck-building process, but were here to make it easier. Make sure the stringers are square off the deck frame by placing a speed square against the deck frame and pressing it against the stringer. x 1.125 in. The fascia may need to be in two pieces to accommodate the width of the stringer. A landing pad is a flat surface made of concrete, pavers or gravel at the bottom of the steps. 10 would be the length of the run on the stringer. Make a line and place an X where the stringer is to be placed. Pry on the handle of the hammer and raise the stringer into place so that it is flush with the top of the rim board. The end of the tape must be placed in the same orientation on each diagonal measurement. This document assumes that the total run is not limited, so you can make the assembly as long as you want. Learn about the building codes that regulate guardrails. This action will be done later but the planning is needed now. To support this newel post, 5 Simpson Strong Tie SDWS Timber screws need to be placed through the rim board and into the stringer. Lay out the stairs by drawing on the outside of the square, sliding the square along until it meets the last mark to learn how to build steps. x 30 in. Non-Slip Aluminum Tread, Brown, 2.75 in. Review the code requirements for stair construction. Divide any remainder and add it equally to each step (for example, 33 deck height, equals 4 stairs, 8 each). For any home project, be certain to follow local code and permitting requirements. Non-Slip Aluminum Tread, Black, 2 in. To make sure the space stays even for the newel post to slide into, place a small piece of 4x4 in between the stringers to hold the spacing while the fasteners are attached. 10 for the riser fascia = 10. When the stringer is complete, the fascia can be cut out. A stair tread is the width (or depth) of a single stair run. Stringers must be securely attached to the deck at the top end. x 48 in. Wanting to know what others are using for exterior stair risers? Mark 6 down from the top of the frame. Use the story pole from Step 3 and hold it where the stairway will end. 10 would be the length of the run on the stringer. Despite these minimum requirements, we recommend that stairs should be at least 48 inches wide so they dont feel cramped. Position them so that the top end rests against the bottom of the deck boards, with one flat face against the inside of the rim joist, or deck face plate. In this document you will find information about: 2) 40-1/2" divided by 7" per riser = 5.78 risers, 3) Round 5.78 up to 6 risers, then 40-1/2" divided by
Measure from the string to ground level at the base of the stake. Fasten the support block in place. Slide the newel post into position between the last two stringers. Place the template against the 2x12 with the run side closest to the end of the 2x12. x 10-1/4 in. Place the 4x4 flush with the edge of the stringer and close to the ground. 11 nosing = 10 . All rights reserved. This document covers building procedures for a straight-run utility stairway, typically used on porches and decks. In this case, a concrete pad will be poured. Copyright 2022 Trex Company, Inc. All rights reserved. Measure from the top of the form to the bottom of the 2x4 (which represents the top of the deck). Place two pieces of decking on top of the stringer treads and trace the top of the decking pieces. That method will be covered later in these instructions (see Chapter 11). Continue that line all the way across the piece of fascia. In this case, the two deck boards, 5 + 5 + for spacing = 11 . Once the post is plumb, use a 3 exterior wood screw to tack the post in place. Mark the bottom of the stringer to remove the tread thickness. Both sides need to be placed at the same distance.