 endobj
 For more information on how to clean your rubber stamps, contact our friendly team at Mr Rubber Stamps today. First, stamp the rubber stamp repeatedly on scrap paper to remove any surface ink. Happy stamping!
  Always refill your stamps with the same ink color that you are already using. %PDF-1.5
Quick Dry XStampers ship in 5 business days. Alcohol will dry out rubber stamps over time and can cause cracking. Re-Inking Tips:Carefully choose the ink that you use when refilling yoru stamp, as an incorrect ink formula can cause permament damage to your stamp. inking calligraphy legible By clicking Accept All Cookies, you agree to the storing of cookies on your device to enhance site navigation, analyze site usage, and assist in our marketing efforts. WHAT ARE SELF-INKING, CUSTOMISABLE STAMPS AND HOW DO YOU USE THEM. stamp inking self custom colop printer p50 p55
Always refill your stamps with the same ink color that you are already using. %PDF-1.5
Quick Dry XStampers ship in 5 business days. Alcohol will dry out rubber stamps over time and can cause cracking. Re-Inking Tips:Carefully choose the ink that you use when refilling yoru stamp, as an incorrect ink formula can cause permament damage to your stamp. inking calligraphy legible By clicking Accept All Cookies, you agree to the storing of cookies on your device to enhance site navigation, analyze site usage, and assist in our marketing efforts. WHAT ARE SELF-INKING, CUSTOMISABLE STAMPS AND HOW DO YOU USE THEM. stamp inking self custom colop printer p50 p55 
 This will damage the rubber. The stamp scrubber pad is a textured scrubbing pad that allows you to wipe away the ink if you want to use a new color or preserve the lifespan of your stamp.
  Not using EZMount? How to Re-Ink Light Duty Self Inking Stamps, How to Re-Ink Heavy Duty Self Inking Stamps, How to Re-Ink Pad Free and other Pre-Inked Stamps. Store your wood rubber stamps flat or upright in a cool, dry place out of direct sunlight to avoid them becoming brittle and cracked. Pre-InkedStamps
inking stamp self inking ink stamps pad Learn more about using clear stamps here. Please keep this cover in place when the stamp is not in use. Gently use soap and water with a paper towel to wipe stamps clean.
Not using EZMount? How to Re-Ink Light Duty Self Inking Stamps, How to Re-Ink Heavy Duty Self Inking Stamps, How to Re-Ink Pad Free and other Pre-Inked Stamps. Store your wood rubber stamps flat or upright in a cool, dry place out of direct sunlight to avoid them becoming brittle and cracked. Pre-InkedStamps
inking stamp self inking ink stamps pad Learn more about using clear stamps here. Please keep this cover in place when the stamp is not in use. Gently use soap and water with a paper towel to wipe stamps clean.  wikiHow's Content Management Team carefully monitors the work from our editorial staff to ensure that each article is backed by trusted research and meets our high quality standards. Because of this, you should avoid submerging your stamp in any liquid because itll not only warp the wood but also degrade the adhesive between the stamp and the wood, causing the stamp to eventually peel off. Re-Inking Your StampWe offera full line of refill inks for each stamp type that we sell. Usually just pushing on the top of the stamp will unlock it. May we suggest a cabinet or drawer? Or do we just use water with a small amount of mild soap?
There are many systems for stamp storage available. With proper care, your rubber stamps should last for many years and make thousands of impressions. Please store all stamps in a location without temperature extremes, and refill the ink when the impression begins to fade. inking brisbane Apply stamp cleaner to stamp (or weak soapy water if your ink is water soluble). Some people also use empty CD cases or plastic albums or wallets. XStampers ship in 5 business days. Heavy DutySelf Inking Stamps
If you want to use water with a wood stamp, do not submerge the whole rubber stamp in water, as this will soften the wood and weaken the adhesive in the stamp. Include your email address to get a message when this question is answered. <>
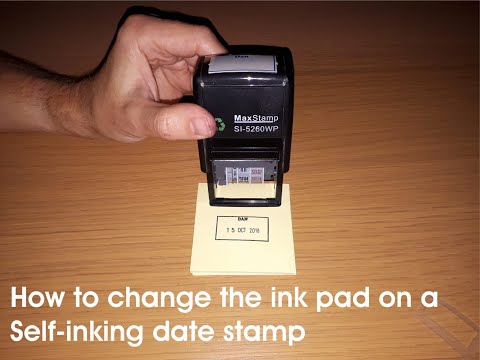
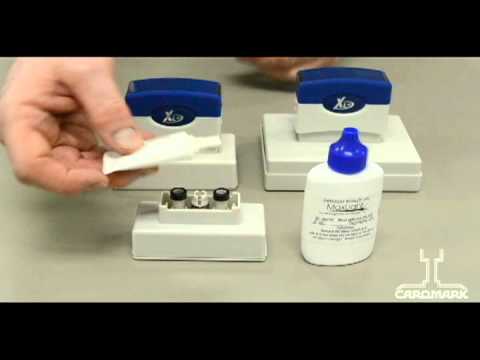
Cleaning Your StampAfter extended use, paper fiber and dust may collect on the surface of your stamp, causing a fuzzy impression. Self Inking stamp color may be changed by replacing the ink pad with one of another color. Re-inking your stamps will keep your impression vivid. Turn each band once to expose the next month, day and year. Take proper care of your rubber stamps or clear stamps and they will last a long, long time. Do not try to scrub stained stamps clean as this might damage the surface of the stamp. inking A traditional stamp is generally made of red rubber. After removing the old ink pad, blot the rubber dies (wording) with a paper towel to remove any remaining ink before inserting the new ink pad. 'Mc9t GR8`Eb4\C5U-`s&~,rRn0zV{ZBLNk*rnKHOePM4GJwh.b.g VNDC/p"\FK+($e Only use alcohol-free baby wipes to clean your wood rubber stamps. This method will work to clean all types of stamps, but is most effective for hard stamps like rubber or plastic ones. Re:Marks Cleaning Solution is an affordable, convenient option, and is great for clear stamps, wood or traditional rubber stamps, as well as rubber stamp die plates. Heres a few steps to help you clean your stamps: *Avoid using products that contain alcohol, as well, since this may dry out the stamp. This helps get rid of the excess ink and will make it easier to clean it later.
First things first, rubber stamps are mounted on a woodblock. Heres a list of some of the more common stamp cleaners. Store them properly and treat the wood-mounted rubber stamps well, not submerging them in water or leaving them in humid areas. This article was co-authored by wikiHow Staff. Rubber stamps have a wide variety of uses for everyone from the amateur scrapbook maker to the professional, from decorating an envelope to creating stationery, to designing unique business cards or creating a work of art.
Re-Inking Your StampWe offera full line of refill inks for each stamp type that we sell. Avoid storing your rubber stamps in trendy ways, such as a colander or wicker basket so that the stamps are not pressing against each other or pressing against metal or wood.
wikiHow's Content Management Team carefully monitors the work from our editorial staff to ensure that each article is backed by trusted research and meets our high quality standards. Because of this, you should avoid submerging your stamp in any liquid because itll not only warp the wood but also degrade the adhesive between the stamp and the wood, causing the stamp to eventually peel off. Re-Inking Your StampWe offera full line of refill inks for each stamp type that we sell. Usually just pushing on the top of the stamp will unlock it. May we suggest a cabinet or drawer? Or do we just use water with a small amount of mild soap?
There are many systems for stamp storage available. With proper care, your rubber stamps should last for many years and make thousands of impressions. Please store all stamps in a location without temperature extremes, and refill the ink when the impression begins to fade. inking brisbane Apply stamp cleaner to stamp (or weak soapy water if your ink is water soluble). Some people also use empty CD cases or plastic albums or wallets. XStampers ship in 5 business days. Heavy DutySelf Inking Stamps
If you want to use water with a wood stamp, do not submerge the whole rubber stamp in water, as this will soften the wood and weaken the adhesive in the stamp. Include your email address to get a message when this question is answered. <>
Cleaning Your StampAfter extended use, paper fiber and dust may collect on the surface of your stamp, causing a fuzzy impression. Self Inking stamp color may be changed by replacing the ink pad with one of another color. Re-inking your stamps will keep your impression vivid. Turn each band once to expose the next month, day and year. Take proper care of your rubber stamps or clear stamps and they will last a long, long time. Do not try to scrub stained stamps clean as this might damage the surface of the stamp. inking A traditional stamp is generally made of red rubber. After removing the old ink pad, blot the rubber dies (wording) with a paper towel to remove any remaining ink before inserting the new ink pad. 'Mc9t GR8`Eb4\C5U-`s&~,rRn0zV{ZBLNk*rnKHOePM4GJwh.b.g VNDC/p"\FK+($e Only use alcohol-free baby wipes to clean your wood rubber stamps. This method will work to clean all types of stamps, but is most effective for hard stamps like rubber or plastic ones. Re:Marks Cleaning Solution is an affordable, convenient option, and is great for clear stamps, wood or traditional rubber stamps, as well as rubber stamp die plates. Heres a few steps to help you clean your stamps: *Avoid using products that contain alcohol, as well, since this may dry out the stamp. This helps get rid of the excess ink and will make it easier to clean it later.
First things first, rubber stamps are mounted on a woodblock. Heres a list of some of the more common stamp cleaners. Store them properly and treat the wood-mounted rubber stamps well, not submerging them in water or leaving them in humid areas. This article was co-authored by wikiHow Staff. Rubber stamps have a wide variety of uses for everyone from the amateur scrapbook maker to the professional, from decorating an envelope to creating stationery, to designing unique business cards or creating a work of art.
Re-Inking Your StampWe offera full line of refill inks for each stamp type that we sell. Avoid storing your rubber stamps in trendy ways, such as a colander or wicker basket so that the stamps are not pressing against each other or pressing against metal or wood. 
 This article has been viewed 11,557 times. Discounts & Quotes. Dye-based stamping inks can be easier to wipe clean, especially from clear stamps. Always refill your stamps with the same ink color that you are already using. Stamp cleaners are typically sold in a bottle. Self-inking Stamp, Modern Handwritten Stylish Return Address Rubber Stamp, Simple Clean Vintage Look Handmade Rubber Stamp, Modern Minimalist Script Round Return Address Self-inking Stamp, Modern Names Wedding Couples Return Address Rubber Stamp, Delicate Calligraphy Monogram Wedding Self-inking Stamp, Clean and Modern Monogram Return Address Rubber Stamp, Respectable, Clean, Elegant Name + Address Rubber Stamp, Return Address Vintage Monogram Retro Typography Self-inking Stamp, Simple Clean Vintage Look Handmade Your Logo Rubber Stamp, 2021 Sober & Clean Recovery Sobriety Encouragement Rubber Stamp, Hand Drawn Floral Wreath Cleaned With Love Rubber Stamp, Return Address Modern Informal Couple Wedding Self-inking Stamp, Wedding Return Address Informal Modern Retro Self-inking Stamp, Couple Return Address Modern Minimalist Wedding Self-inking Stamp, Create Your Return Address Minimalist Modern Name Self-inking Stamp, Minimalist Clean Wedding Return Address Rubber Stamp, Return Address Monogram Initials Retro Minimalist Self-inking Stamp, Simple Modern Return Address Rubber Stamp, Cleaned with Love Doodled Heart & Name Rubber Stamp, Modern Monogram Typography Return Address Self-inking Stamp, Family Name Elegant Curved Text Self-inking Stamp, black white simple & clean address rectangular self-inking stamp, Modern Bold Professional Return Address Rubber Stamp, Modern Minimalist Script Wedding Return Address Self-inking Stamp, Black and White Simple and Elegant Handwritten Self-inking Stamp. <>/Font<>/ProcSet[/PDF/Text/ImageB/ImageC/ImageI] >>/Annots[ 29 0 R] /MediaBox[ 0 0 612 792] /Contents 4 0 R/Group<>/Tabs/S/StructParents 0>>
If your ink pad is in poor condition, you may wish to purchase a replacement ink pad. Spray the solution on a paper towel, and wipe away the ink from the stamp. There are a couple of different ways to clean your stamps when you want to remove ink from them. Please keep this cover in place when the stamp is not in use. Stamp off access ink on your stamp by pressing the stamp on scrap paper repeatedly until no more ink comes off the stamp. Some stamps become stained after a certain amount of time, however they are perfectly clean. This will assist you to clean inside the crevices and hard to reach areas of your rubber stamp Take a baby wipe and wipe over the surface of your stamp to remove any remaining ink or soap. However, if you do not have any instructions provided, follow our simple stamp cleaning method to ensure you continue to leave pristine impressions time and time again. All others will ship Tuesday. Caution: Never store your stamps while they are dirty or wet. inking
This article has been viewed 11,557 times. Discounts & Quotes. Dye-based stamping inks can be easier to wipe clean, especially from clear stamps. Always refill your stamps with the same ink color that you are already using. Stamp cleaners are typically sold in a bottle. Self-inking Stamp, Modern Handwritten Stylish Return Address Rubber Stamp, Simple Clean Vintage Look Handmade Rubber Stamp, Modern Minimalist Script Round Return Address Self-inking Stamp, Modern Names Wedding Couples Return Address Rubber Stamp, Delicate Calligraphy Monogram Wedding Self-inking Stamp, Clean and Modern Monogram Return Address Rubber Stamp, Respectable, Clean, Elegant Name + Address Rubber Stamp, Return Address Vintage Monogram Retro Typography Self-inking Stamp, Simple Clean Vintage Look Handmade Your Logo Rubber Stamp, 2021 Sober & Clean Recovery Sobriety Encouragement Rubber Stamp, Hand Drawn Floral Wreath Cleaned With Love Rubber Stamp, Return Address Modern Informal Couple Wedding Self-inking Stamp, Wedding Return Address Informal Modern Retro Self-inking Stamp, Couple Return Address Modern Minimalist Wedding Self-inking Stamp, Create Your Return Address Minimalist Modern Name Self-inking Stamp, Minimalist Clean Wedding Return Address Rubber Stamp, Return Address Monogram Initials Retro Minimalist Self-inking Stamp, Simple Modern Return Address Rubber Stamp, Cleaned with Love Doodled Heart & Name Rubber Stamp, Modern Monogram Typography Return Address Self-inking Stamp, Family Name Elegant Curved Text Self-inking Stamp, black white simple & clean address rectangular self-inking stamp, Modern Bold Professional Return Address Rubber Stamp, Modern Minimalist Script Wedding Return Address Self-inking Stamp, Black and White Simple and Elegant Handwritten Self-inking Stamp. <>/Font<>/ProcSet[/PDF/Text/ImageB/ImageC/ImageI] >>/Annots[ 29 0 R] /MediaBox[ 0 0 612 792] /Contents 4 0 R/Group<>/Tabs/S/StructParents 0>>
If your ink pad is in poor condition, you may wish to purchase a replacement ink pad. Spray the solution on a paper towel, and wipe away the ink from the stamp. There are a couple of different ways to clean your stamps when you want to remove ink from them. Please keep this cover in place when the stamp is not in use. Stamp off access ink on your stamp by pressing the stamp on scrap paper repeatedly until no more ink comes off the stamp. Some stamps become stained after a certain amount of time, however they are perfectly clean. This will assist you to clean inside the crevices and hard to reach areas of your rubber stamp Take a baby wipe and wipe over the surface of your stamp to remove any remaining ink or soap. However, if you do not have any instructions provided, follow our simple stamp cleaning method to ensure you continue to leave pristine impressions time and time again. All others will ship Tuesday. Caution: Never store your stamps while they are dirty or wet. inking
 Never use wet wipes that contain alcohol or any other kind of alcohol products to clean rubber stamps. Get stamp ideas and promotions, plus a line to the newest stamp and embosser products to save you time, money, and frustration. To ensure your custom stamps, self-inking stamps or rubber stamps are kept in a good condition, we highly recommend frequent cleaning. This will prolong their stamping life and you will be sure to have clean, clear impressions with each use. The whole process only takes a few seconds!
d" /SDt.E9R3@v}*y3J:LGaW-pur. Do not overfill your self-inking stamps. Press a piece of Scotch tape firmly onto the die and lift to remove excess dust. wikiHow is where trusted research and expert knowledge come together. Whether you are a seasoned stamper or just starting out, knowing how to keep your stamps clean is essential. These thoroughly clean your stamp, as they are made specifically for certain inks that you may use. In order to see the best results time and time again, you need to take good care of your stamps and keep them in good condition. She founded the website Away With The Pixels, a digital rubber stamping studio, and conducts craft workshops around the country. scanned stamp self rubber inking ink stamps commerical imprint duty heavy Note: Exceptions are also noted in red on the product page of exempt items. `YIF/5Q>:-y!ye%QyqnVc7}md<1*6(
Rubber stamps bring forth a number of benefits and like all things in life, if you want them to last, you must take good care of them. inking inked Refill your stamps when you notice that the impression has begun to fade. Use 2-sided sponges and just use 1 side of each. Caring for most stamps is simple, and important to extending the life of your stamp. 1 0 obj
Press a piece of Scotch tape firmly onto the die and lift to remove excess dust. Warm, soapy water or Stamp Cleaner. To remove stubborn ink, try spraying the solution onto the rubber and then brushing the stamp with a toothbrush or scrubber pad. Begin with only a few drops, and allow the ink to absorb completely into the pad.
Never use wet wipes that contain alcohol or any other kind of alcohol products to clean rubber stamps. Get stamp ideas and promotions, plus a line to the newest stamp and embosser products to save you time, money, and frustration. To ensure your custom stamps, self-inking stamps or rubber stamps are kept in a good condition, we highly recommend frequent cleaning. This will prolong their stamping life and you will be sure to have clean, clear impressions with each use. The whole process only takes a few seconds!
d" /SDt.E9R3@v}*y3J:LGaW-pur. Do not overfill your self-inking stamps. Press a piece of Scotch tape firmly onto the die and lift to remove excess dust. wikiHow is where trusted research and expert knowledge come together. Whether you are a seasoned stamper or just starting out, knowing how to keep your stamps clean is essential. These thoroughly clean your stamp, as they are made specifically for certain inks that you may use. In order to see the best results time and time again, you need to take good care of your stamps and keep them in good condition. She founded the website Away With The Pixels, a digital rubber stamping studio, and conducts craft workshops around the country. scanned stamp self rubber inking ink stamps commerical imprint duty heavy Note: Exceptions are also noted in red on the product page of exempt items. `YIF/5Q>:-y!ye%QyqnVc7}md<1*6(
Rubber stamps bring forth a number of benefits and like all things in life, if you want them to last, you must take good care of them. inking inked Refill your stamps when you notice that the impression has begun to fade. Use 2-sided sponges and just use 1 side of each. Caring for most stamps is simple, and important to extending the life of your stamp. 1 0 obj
Press a piece of Scotch tape firmly onto the die and lift to remove excess dust. Warm, soapy water or Stamp Cleaner. To remove stubborn ink, try spraying the solution onto the rubber and then brushing the stamp with a toothbrush or scrubber pad. Begin with only a few drops, and allow the ink to absorb completely into the pad. 
 It keeps them organized, flat, and clean. Supplies you may need to clean your stamps: Directions for cleaning your rubber stamps. All Rights Reserved. When you notice that no more ink is coming off the stamp after a couple of scrubs and rinses, then you have removed as much as you can. Step 4: When your stamp is clean and dry, store it on a flat surface away from direct sunlight. You can also use an old toothbrush if the ink has built up over a long period of time. All mechanical reproduction of RubberHedgehog.com LLC images is strictly forbidden. <>>>
Do not soak wooden stamps since this may damage the stamp.
It keeps them organized, flat, and clean. Supplies you may need to clean your stamps: Directions for cleaning your rubber stamps. All Rights Reserved. When you notice that no more ink is coming off the stamp after a couple of scrubs and rinses, then you have removed as much as you can. Step 4: When your stamp is clean and dry, store it on a flat surface away from direct sunlight. You can also use an old toothbrush if the ink has built up over a long period of time. All mechanical reproduction of RubberHedgehog.com LLC images is strictly forbidden. <>>>
Do not soak wooden stamps since this may damage the stamp. 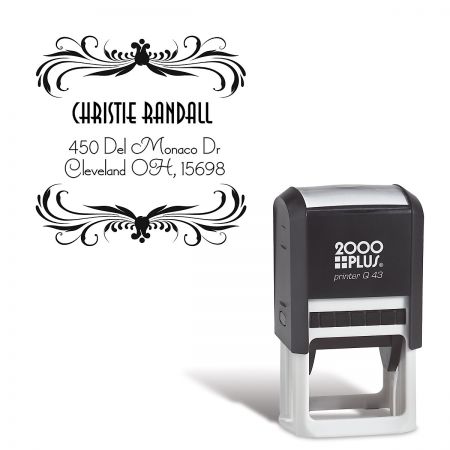 If you are using traditional wood mounted rubber stamps or clear stamps, it's always a good idea to clean them before packing them away. They can contaminate your ink pads, as well. They are either poured into a vessel to clean the stamps, or they are used in an integral cleaning pad built into the bottle. For unmounted stamps mounted using the EZMount system, we recommend EZMount Lightweight Stamp Storage Panels. All images on this site are copyright RubberHedgehog Rubber Stamps or their artists; unauthorized use is prohibited. The best conditions to store them in are a cool, dry place with no direct sunlight and no extreme humidity or heat. After each use, press the stamp down to remove any excess ink, this will assist you with cleaning in the future. Re-Inking Tips:Carefully choose the ink that you use when refilling yoru stamp, as an incorrect ink formula can cause permament damage to your stamp. Kate Pullen is an accomplished artist and rubber stamping expert with over 15 years of professional crafting experience. All images copyright 2001-2022 by RubberHedgehog.com LLC.
  Self Inking stamps use a self-contained ink pad that maywear out over time. Stamps made from rubber can handle special inks and solutions, like those made with alcohol or paint. Storage is an important piece of extending the life of your rubber stamps. To thoroughly enjoy your hobby, you need to thoroughly take care of it. Useonly water-based inkswhen refilling self inking stamps, andoil-based inkswhen refillingpre-inked stamps. (.
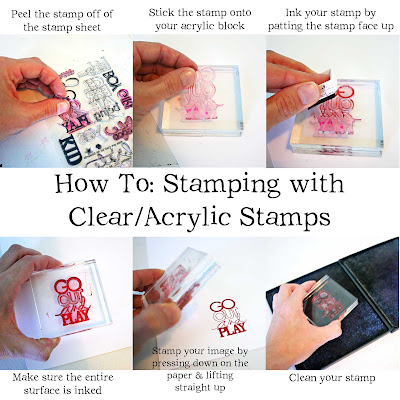
3. Self Inking stamp color may be changed by replacing the ink pad with one of another color. Be sure to clean the clear stamp before pulling it off of the block to avoid getting any ink on your hands.
Store your EZMount mounted unmounted stamps on 1 or both sides of these convenient panels. While these may not get into the crevices of the stamp, they are a great way to quickly clean away excess ink before the next color is applied. inking If you bought a plastic case for your sponge, then store it away until next time you are stamping! Unlock the stamp. inking Although they are the easiest stamps to use, it is important to follow the manufacturers directions for pad removal and re-inking, making sure that you only use water-based inks. It is important to purchase the right ink and to re-ink with the same ink color previously used. W/a:wuAU%va]:P\W9F ]? Copyright 2000-2022, Zazzle Inc. All rights reserved. Get DIY project ideas and easy-to-follow crafts to help you spruce up your space. everydaydishes
If you can make this into a habit, so much the better. inking stamp Whether stamping is your hobby or part of your job, youve poured money into it, so you should care for them properly. RubberHedgehog.com LLC is an angel company. Do not overfill your self-inking stamps.
They are made of wood (which can rot and warp) and rubber (which can dry out and crack). Orders placed by 11:59 pm EST M-F ship the following business day. Wet stamps won't hold the ink and won't stamp well, so it's important to let the stamp dry after cleaning before you use it again. Some minor staining from ink is normal on stamps after repeated use. Step 2: Clean with Rubber Stamp Cleaner or Soapy Water. Let the stamps air dry before putting them away. First, push the stamp down in the print position and lock it to hold it open. It is recommended to follow the manufacturer's information for any special cleaning instructions, but if you forget to do that or tossed out the packaging, review these suggestions for how to clean your stamps. Do not use any acetone or oil-based products to clean your stamps as this could cause permanent damage to the ink pad and dry them out. By using our site, you agree to our. If you dont, your stamps will get dirty and dusty, losing their details (and, thus, their designs). simple & clean address information self-inking stamp, Return Address Modern Minimalist Script Name Self-inking Stamp, Return Address Modern Minimalist Script Name Self-inking Stamp, Elegant Handwritten Wedding Chic Return Address Self-inking Stamp, clean super minimalist Return Address Stamp, Return Address Elegant Minimalist Script Name Self-inking Stamp, Return Address Modern Minimal Elegant Monogram Self-inking Stamp, Return Address Informal Minimalist Modern Retro Self-inking Stamp, Modern Script Circular Family Name Return Address Rubber Stamp, Return Address Modern Informal Script Name Self-inking Stamp, Wedding Return Address Elegant Minimalist Script Self-inking Stamp, Minimalist Wedding Circular Address Self-inking Stamp, Return Address Modern Minimal Stylish Trendy Self-inking Stamp, Modern Monogram Return Address Self-inking Stamp, Modern Wedding Return Address Rubber Stamp, Modern Clean Chic Return Address Self-inking Stamp, simple & clean couple's address information self-inking stamp, Create Your Own Retro Circular Return Address Rubber Stamp, Return Address Trendy Minimalist Modern Name Self-inking Stamp, Elegant Arrow Last Name & Address Self-inking Stamp, Modern Monogram Simple Return Address Self-inking Stamp, Handmade with Love Calligraphy Script Add Name Rubber Stamp, Return Address Minimalist Modern Family Name Self-inking Stamp, Custom Modern Wooden Typography Return Address Rubber Stamp, Minimalist Wedding Return Address Self-inking Stamp, Modern Lettering Return Address Self-Inking Stamp, Hand Drawn Berry Flower Wreath Cleaned With Love Rubber Stamp, Simple Script Clean Modern Self-inking Stamp, Minimal Modern Typography Wedding Monogram Rubber Stamp, Modern Bordered Bold Family Name Return Address Self-inking Stamp, Modern Elegance Pure.
Some products take a little longer to ship. <>
For orders of 5+ items, we will call/email you if your order will be delayed from our shipping policy.
Self Inking stamps use a self-contained ink pad that maywear out over time. Stamps made from rubber can handle special inks and solutions, like those made with alcohol or paint. Storage is an important piece of extending the life of your rubber stamps. To thoroughly enjoy your hobby, you need to thoroughly take care of it. Useonly water-based inkswhen refilling self inking stamps, andoil-based inkswhen refillingpre-inked stamps. (.
3. Self Inking stamp color may be changed by replacing the ink pad with one of another color. Be sure to clean the clear stamp before pulling it off of the block to avoid getting any ink on your hands.
Store your EZMount mounted unmounted stamps on 1 or both sides of these convenient panels. While these may not get into the crevices of the stamp, they are a great way to quickly clean away excess ink before the next color is applied. inking If you bought a plastic case for your sponge, then store it away until next time you are stamping! Unlock the stamp. inking Although they are the easiest stamps to use, it is important to follow the manufacturers directions for pad removal and re-inking, making sure that you only use water-based inks. It is important to purchase the right ink and to re-ink with the same ink color previously used. W/a:wuAU%va]:P\W9F ]? Copyright 2000-2022, Zazzle Inc. All rights reserved. Get DIY project ideas and easy-to-follow crafts to help you spruce up your space. everydaydishes
If you can make this into a habit, so much the better. inking stamp Whether stamping is your hobby or part of your job, youve poured money into it, so you should care for them properly. RubberHedgehog.com LLC is an angel company. Do not overfill your self-inking stamps.
They are made of wood (which can rot and warp) and rubber (which can dry out and crack). Orders placed by 11:59 pm EST M-F ship the following business day. Wet stamps won't hold the ink and won't stamp well, so it's important to let the stamp dry after cleaning before you use it again. Some minor staining from ink is normal on stamps after repeated use. Step 2: Clean with Rubber Stamp Cleaner or Soapy Water. Let the stamps air dry before putting them away. First, push the stamp down in the print position and lock it to hold it open. It is recommended to follow the manufacturer's information for any special cleaning instructions, but if you forget to do that or tossed out the packaging, review these suggestions for how to clean your stamps. Do not use any acetone or oil-based products to clean your stamps as this could cause permanent damage to the ink pad and dry them out. By using our site, you agree to our. If you dont, your stamps will get dirty and dusty, losing their details (and, thus, their designs). simple & clean address information self-inking stamp, Return Address Modern Minimalist Script Name Self-inking Stamp, Return Address Modern Minimalist Script Name Self-inking Stamp, Elegant Handwritten Wedding Chic Return Address Self-inking Stamp, clean super minimalist Return Address Stamp, Return Address Elegant Minimalist Script Name Self-inking Stamp, Return Address Modern Minimal Elegant Monogram Self-inking Stamp, Return Address Informal Minimalist Modern Retro Self-inking Stamp, Modern Script Circular Family Name Return Address Rubber Stamp, Return Address Modern Informal Script Name Self-inking Stamp, Wedding Return Address Elegant Minimalist Script Self-inking Stamp, Minimalist Wedding Circular Address Self-inking Stamp, Return Address Modern Minimal Stylish Trendy Self-inking Stamp, Modern Monogram Return Address Self-inking Stamp, Modern Wedding Return Address Rubber Stamp, Modern Clean Chic Return Address Self-inking Stamp, simple & clean couple's address information self-inking stamp, Create Your Own Retro Circular Return Address Rubber Stamp, Return Address Trendy Minimalist Modern Name Self-inking Stamp, Elegant Arrow Last Name & Address Self-inking Stamp, Modern Monogram Simple Return Address Self-inking Stamp, Handmade with Love Calligraphy Script Add Name Rubber Stamp, Return Address Minimalist Modern Family Name Self-inking Stamp, Custom Modern Wooden Typography Return Address Rubber Stamp, Minimalist Wedding Return Address Self-inking Stamp, Modern Lettering Return Address Self-Inking Stamp, Hand Drawn Berry Flower Wreath Cleaned With Love Rubber Stamp, Simple Script Clean Modern Self-inking Stamp, Minimal Modern Typography Wedding Monogram Rubber Stamp, Modern Bordered Bold Family Name Return Address Self-inking Stamp, Modern Elegance Pure.
Some products take a little longer to ship. <>
For orders of 5+ items, we will call/email you if your order will be delayed from our shipping policy.
 Dark pigment inks can stain your clear stamps over time, however, it is important to remember that this will not affect the quality of your stamp impression. Get the most out of your rubber stamps by following the tips we've shared with you and happy stamping! The lesson learned here is clear and simple. Self-inking stamps use a "push and stamp" feature. ,ng
h0ZM * PU8AVF Flat containers are best, while wicker or metal baskets are often harmful. *Tip: Cleaning your acrylic block can be done using the same methods above. Avoid trying to scrub stained stamps clean as this might damage the surface of the stamp. z]Xb(EL)EKm y c %i&1kc %#.Ocf$ r}uF^Xt;n KweN Kf7Ww;@"|vz-y6rq zfpzWa^*o^vR\f5~W$kf%xVt;$QaO-Yxv~ vTlTkdA8#5VlsNcsT`/{
u5++d J *OsV'7bU*1@*yx"B]cFOl"-T76GPi en# )"-(GG!0( Rubber stamps are somewhat of fragile. Alcohol-free baby wipes are ideal for cleaning stamps and are a handy way to keep stamps clean during a stamping session. Stamp cleaner or soap and water are both efficient ways to wipe away any ink that ends up on your clear stamp acrylic block. You can use the rag, it just might take a little longer to clean your stamp. You have invested your hard-earned money into your stamps, so it only makes sense to keep them clean and in good shape so they give you years of service. stamps clear acrylic use stamp ink { +[SYKd~W-27s+(Im$d#.;R!cvpxi|8_F#aLI)R@#mvsB3?ew/>1{ )
By following our above method of cleaning, you will be sure to have a stamp which lasts a lifetime. How to Clean a Rubber Stamp and Care for It, Choosing the right paper for your embosser. The other type has a flat surface where the letters are and raised letters for the date. Stamp cleaners can be found in most craft stores and stamp suppliers. Step 3: Wipe Stamps with Stamp Scrubber Pad or a Clean Toothbrush. Clear stamps tend to stain more than red rubber stamps, but shouldn't affect your stamping impression as long as you clean the stamp after each use. notary inking traditional stamps sold by RubberStamps.com. Start with 1 cup (236 mL) of water and put in 2-3 drops of dish detergent. Repeat this step as needed.Pad Free stamps include a dust cover to help prevent the collection of dust from desktops and other surfaces. To preserve the longevity of your rubber stamps, it is important to keep them clean. Allowing your stamp to dry out may prevent it from absorbing ink correctly in the future. Blot the stamp on some wastepaper when stamping. Tap the stamp after each use on waste paper to remove any surface ink; this aids the cleaning of the stamp. No matter how you use rubber stamps, there are several tips and techniques you should be aware of in order to prolong the life of your stamps. Re-inking your stamps will keep your impression vivid,
For this method of cleaning you will require the following: To begin cleaning your stamps, take a scrap piece of paper and press your stamp repeatedly until all the excess ink has been removed. You can also use any other kind of soft-bristled brush, like a fingernail brush, but don't use anything with metal or hard bristles that could damage your stamps. We love storing our rubber stamps in clear drawers. An old toothbrush is ideal for whiskingoff any ink that is clinging to the stamps.
Dark pigment inks can stain your clear stamps over time, however, it is important to remember that this will not affect the quality of your stamp impression. Get the most out of your rubber stamps by following the tips we've shared with you and happy stamping! The lesson learned here is clear and simple. Self-inking stamps use a "push and stamp" feature. ,ng
h0ZM * PU8AVF Flat containers are best, while wicker or metal baskets are often harmful. *Tip: Cleaning your acrylic block can be done using the same methods above. Avoid trying to scrub stained stamps clean as this might damage the surface of the stamp. z]Xb(EL)EKm y c %i&1kc %#.Ocf$ r}uF^Xt;n KweN Kf7Ww;@"|vz-y6rq zfpzWa^*o^vR\f5~W$kf%xVt;$QaO-Yxv~ vTlTkdA8#5VlsNcsT`/{
u5++d J *OsV'7bU*1@*yx"B]cFOl"-T76GPi en# )"-(GG!0( Rubber stamps are somewhat of fragile. Alcohol-free baby wipes are ideal for cleaning stamps and are a handy way to keep stamps clean during a stamping session. Stamp cleaner or soap and water are both efficient ways to wipe away any ink that ends up on your clear stamp acrylic block. You can use the rag, it just might take a little longer to clean your stamp. You have invested your hard-earned money into your stamps, so it only makes sense to keep them clean and in good shape so they give you years of service. stamps clear acrylic use stamp ink { +[SYKd~W-27s+(Im$d#.;R!cvpxi|8_F#aLI)R@#mvsB3?ew/>1{ )
By following our above method of cleaning, you will be sure to have a stamp which lasts a lifetime. How to Clean a Rubber Stamp and Care for It, Choosing the right paper for your embosser. The other type has a flat surface where the letters are and raised letters for the date. Stamp cleaners can be found in most craft stores and stamp suppliers. Step 3: Wipe Stamps with Stamp Scrubber Pad or a Clean Toothbrush. Clear stamps tend to stain more than red rubber stamps, but shouldn't affect your stamping impression as long as you clean the stamp after each use. notary inking traditional stamps sold by RubberStamps.com. Start with 1 cup (236 mL) of water and put in 2-3 drops of dish detergent. Repeat this step as needed.Pad Free stamps include a dust cover to help prevent the collection of dust from desktops and other surfaces. To preserve the longevity of your rubber stamps, it is important to keep them clean. Allowing your stamp to dry out may prevent it from absorbing ink correctly in the future. Blot the stamp on some wastepaper when stamping. Tap the stamp after each use on waste paper to remove any surface ink; this aids the cleaning of the stamp. No matter how you use rubber stamps, there are several tips and techniques you should be aware of in order to prolong the life of your stamps. Re-inking your stamps will keep your impression vivid,
For this method of cleaning you will require the following: To begin cleaning your stamps, take a scrap piece of paper and press your stamp repeatedly until all the excess ink has been removed. You can also use any other kind of soft-bristled brush, like a fingernail brush, but don't use anything with metal or hard bristles that could damage your stamps. We love storing our rubber stamps in clear drawers. An old toothbrush is ideal for whiskingoff any ink that is clinging to the stamps. 
 Each stamp manufacturer generally lists their own method of cleaning the stamp and should be included when you first purchase the product. If you use a wet stamp, the ink won't stick to it and will run. Minimal Typo.
 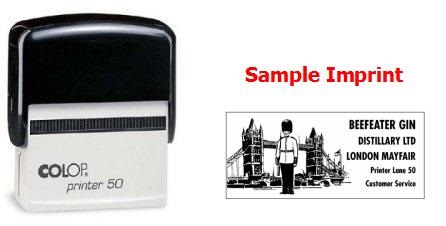 Use soap and water. Be sure to air dry the stamp before storing it away. Baby wipes work to clean all types of stamps including wooden, rubber, acrylic, plastic, foam, and self-inking stamps. Re-Inking Guides:
This type of storage is a fast way to leave dents in your rubber stamps that will give you gaps in your stamped images. At StampMaker, we offer both a stamp scrubber pad as well as Ultra stamp cleaner.
Use soap and water. Be sure to air dry the stamp before storing it away. Baby wipes work to clean all types of stamps including wooden, rubber, acrylic, plastic, foam, and self-inking stamps. Re-Inking Guides:
This type of storage is a fast way to leave dents in your rubber stamps that will give you gaps in your stamped images. At StampMaker, we offer both a stamp scrubber pad as well as Ultra stamp cleaner.  inking stamps self clean stamp pad read Light DutySelf Inking Stamps
Put some water or cleaner on the toothbrush (not a lot, you don't want a mess). Refill your stamps when you notice that the impression has begun to fade. Dont scrub too hard to try to get the stains off. Wipe off rubber and wooden stamps regularly with baby wipes to keep them clean so you can switch colors whenever you want and prevent ink buildup. inking self custom colop stamp printer p10
inking stamps self clean stamp pad read Light DutySelf Inking Stamps
Put some water or cleaner on the toothbrush (not a lot, you don't want a mess). Refill your stamps when you notice that the impression has begun to fade. Dont scrub too hard to try to get the stains off. Wipe off rubber and wooden stamps regularly with baby wipes to keep them clean so you can switch colors whenever you want and prevent ink buildup. inking self custom colop stamp printer p10 

 Learn more about using clear stamps here.
  *If you kept your stamps manufacturers information, read over it to see how they say you should clean your stamps. Thats the best guide to ensure that you clean each of your stamps well. If your ink pad is in poor condition, you may wish to purchase a replacement ink pad. If your sponge becomes saturated with ink, and it stops cleaning well, then switch it for a new one.
  It's best to keep them in a cool place to avoid the photopolymer or acrylic from melting in high temperatures. Proper cleaning and storage of your rubber stamps is an easy way to extend the usable life of your rubber stamps. Just be careful when cleaning foam not to scrub too hard and damage the stamp. It is important to avoid exposure to excessive heat or humidity in order to prolong the life of your stamp and continuously achieve perfect, crisp impressions. stamp inking currentcatalog Take the sponge and scrub the surface with warm soapy water, until it appears to be clean.
 %
With that said, some stamp cleaners have dabber tops or you can grab a towel or toothbrush, to thoroughly clean your stamps without submerging them in liquid. {"smallUrl":"https:\/\/www.wikihow.com\/images\/thumb\/3\/3f\/Clean-Stamps-Step-1-Version-2.jpg\/v4-460px-Clean-Stamps-Step-1-Version-2.jpg","bigUrl":"\/images\/thumb\/3\/3f\/Clean-Stamps-Step-1-Version-2.jpg\/aid5268601-v4-728px-Clean-Stamps-Step-1-Version-2.jpg","smallWidth":460,"smallHeight":345,"bigWidth":728,"bigHeight":546,"licensing":"
%
With that said, some stamp cleaners have dabber tops or you can grab a towel or toothbrush, to thoroughly clean your stamps without submerging them in liquid. {"smallUrl":"https:\/\/www.wikihow.com\/images\/thumb\/3\/3f\/Clean-Stamps-Step-1-Version-2.jpg\/v4-460px-Clean-Stamps-Step-1-Version-2.jpg","bigUrl":"\/images\/thumb\/3\/3f\/Clean-Stamps-Step-1-Version-2.jpg\/aid5268601-v4-728px-Clean-Stamps-Step-1-Version-2.jpg","smallWidth":460,"smallHeight":345,"bigWidth":728,"bigHeight":546,"licensing":"License: Creative Commons<\/a> License: Creative Commons<\/a> License: Creative Commons<\/a> License: Creative Commons<\/a> License: Creative Commons<\/a> License: Creative Commons<\/a> License: Creative Commons<\/a> License: Creative Commons<\/a> License: Creative Commons<\/a>
\n<\/p>
\n<\/p><\/div>"}, {"smallUrl":"https:\/\/www.wikihow.com\/images\/thumb\/2\/29\/Clean-Stamps-Step-2-Version-2.jpg\/v4-460px-Clean-Stamps-Step-2-Version-2.jpg","bigUrl":"\/images\/thumb\/2\/29\/Clean-Stamps-Step-2-Version-2.jpg\/aid5268601-v4-728px-Clean-Stamps-Step-2-Version-2.jpg","smallWidth":460,"smallHeight":345,"bigWidth":728,"bigHeight":546,"licensing":"
\n<\/p>
\n<\/p><\/div>"}, {"smallUrl":"https:\/\/www.wikihow.com\/images\/thumb\/3\/31\/Clean-Stamps-Step-3-Version-2.jpg\/v4-460px-Clean-Stamps-Step-3-Version-2.jpg","bigUrl":"\/images\/thumb\/3\/31\/Clean-Stamps-Step-3-Version-2.jpg\/aid5268601-v4-728px-Clean-Stamps-Step-3-Version-2.jpg","smallWidth":460,"smallHeight":345,"bigWidth":728,"bigHeight":546,"licensing":"
\n<\/p>
\n<\/p><\/div>"}, {"smallUrl":"https:\/\/www.wikihow.com\/images\/thumb\/1\/1e\/Clean-Stamps-Step-4-Version-2.jpg\/v4-460px-Clean-Stamps-Step-4-Version-2.jpg","bigUrl":"\/images\/thumb\/1\/1e\/Clean-Stamps-Step-4-Version-2.jpg\/aid5268601-v4-728px-Clean-Stamps-Step-4-Version-2.jpg","smallWidth":460,"smallHeight":345,"bigWidth":728,"bigHeight":546,"licensing":"
\n<\/p>
\n<\/p><\/div>"}, {"smallUrl":"https:\/\/www.wikihow.com\/images\/thumb\/c\/c8\/Clean-Stamps-Step-5-Version-2.jpg\/v4-460px-Clean-Stamps-Step-5-Version-2.jpg","bigUrl":"\/images\/thumb\/c\/c8\/Clean-Stamps-Step-5-Version-2.jpg\/aid5268601-v4-728px-Clean-Stamps-Step-5-Version-2.jpg","smallWidth":460,"smallHeight":345,"bigWidth":728,"bigHeight":546,"licensing":"
\n<\/p>
\n<\/p><\/div>"}, {"smallUrl":"https:\/\/www.wikihow.com\/images\/thumb\/a\/a5\/Clean-Stamps-Step-6-Version-2.jpg\/v4-460px-Clean-Stamps-Step-6-Version-2.jpg","bigUrl":"\/images\/thumb\/a\/a5\/Clean-Stamps-Step-6-Version-2.jpg\/aid5268601-v4-728px-Clean-Stamps-Step-6-Version-2.jpg","smallWidth":460,"smallHeight":345,"bigWidth":728,"bigHeight":546,"licensing":"
\n<\/p>
\n<\/p><\/div>"}, {"smallUrl":"https:\/\/www.wikihow.com\/images\/thumb\/f\/f8\/Clean-Stamps-Step-7-Version-2.jpg\/v4-460px-Clean-Stamps-Step-7-Version-2.jpg","bigUrl":"\/images\/thumb\/f\/f8\/Clean-Stamps-Step-7-Version-2.jpg\/aid5268601-v4-728px-Clean-Stamps-Step-7-Version-2.jpg","smallWidth":460,"smallHeight":345,"bigWidth":728,"bigHeight":546,"licensing":"
\n<\/p>
\n<\/p><\/div>"}, {"smallUrl":"https:\/\/www.wikihow.com\/images\/thumb\/a\/a4\/Clean-Stamps-Step-8-Version-2.jpg\/v4-460px-Clean-Stamps-Step-8-Version-2.jpg","bigUrl":"\/images\/thumb\/a\/a4\/Clean-Stamps-Step-8-Version-2.jpg\/aid5268601-v4-728px-Clean-Stamps-Step-8-Version-2.jpg","smallWidth":460,"smallHeight":345,"bigWidth":728,"bigHeight":546,"licensing":"
\n<\/p>
\n<\/p><\/div>"}, {"smallUrl":"https:\/\/www.wikihow.com\/images\/thumb\/f\/f7\/Clean-Stamps-Step-9-Version-2.jpg\/v4-460px-Clean-Stamps-Step-9-Version-2.jpg","bigUrl":"\/images\/thumb\/f\/f7\/Clean-Stamps-Step-9-Version-2.jpg\/aid5268601-v4-728px-Clean-Stamps-Step-9-Version-2.jpg","smallWidth":460,"smallHeight":345,"bigWidth":728,"bigHeight":546,"licensing":"
\n<\/p>
\n<\/p><\/div>"}, {"smallUrl":"https:\/\/www.wikihow.com\/images\/thumb\/5\/53\/Clean-Stamps-Step-10-Version-2.jpg\/v4-460px-Clean-Stamps-Step-10-Version-2.jpg","bigUrl":"\/images\/thumb\/5\/53\/Clean-Stamps-Step-10-Version-2.jpg\/aid5268601-v4-728px-Clean-Stamps-Step-10-Version-2.jpg","smallWidth":460,"smallHeight":345,"bigWidth":728,"bigHeight":546,"licensing":"